Account Registration
Download the job aid (.PDF, 1.3 MB) or follow the steps below.
If you have questions, please contact us at ORAUAccountsPayable@orau.org.
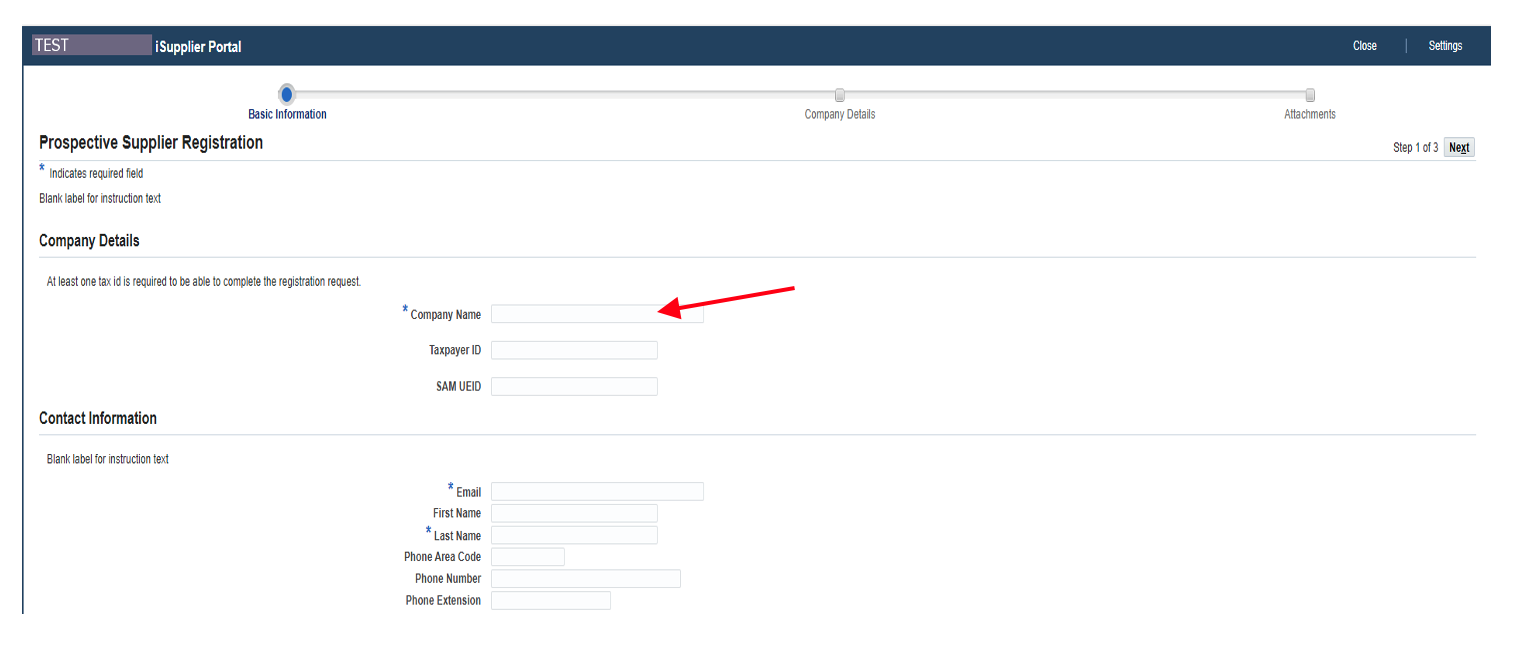
Step 1: Access the registration page
Step 2: Enter your company name (should be legal name from W-9). Please do not use any punctuation marks except an apostrophe.
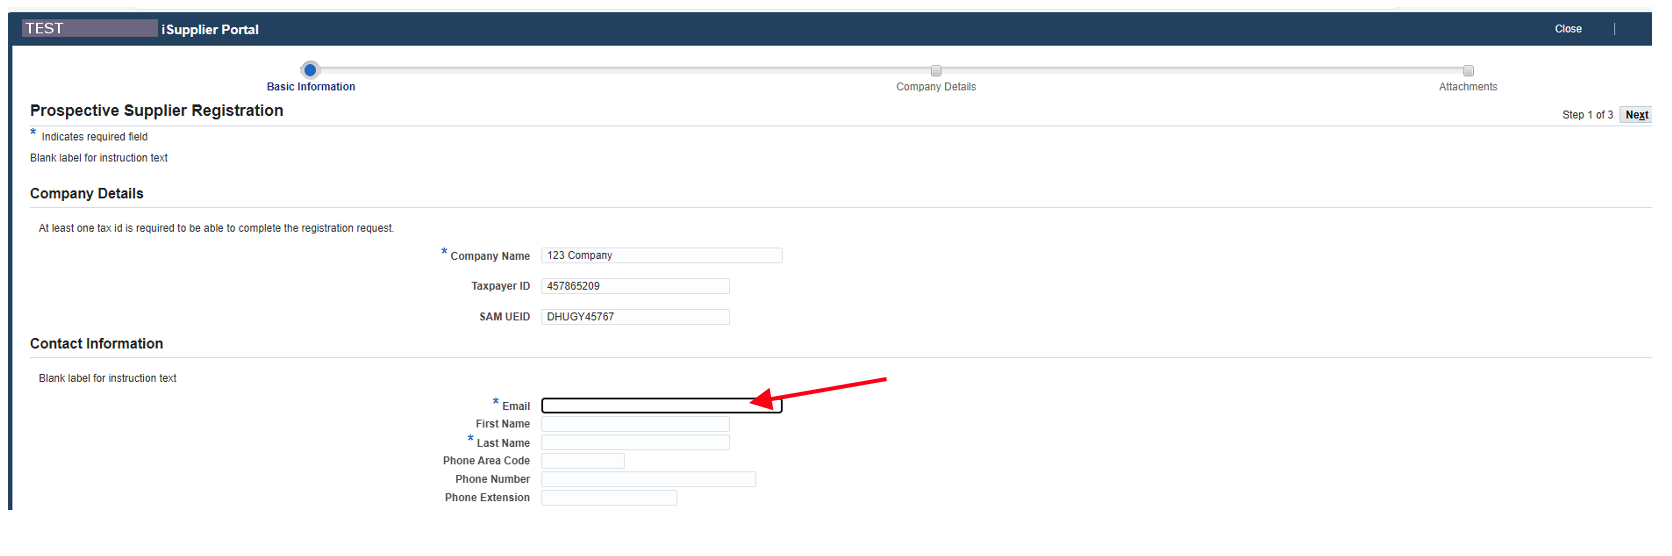
Step 3: Enter your Taxpayer ID (do not include dashes) and enter your ‘SAM UEID,’ if applicable.

Step 4: Enter your preferred email address.
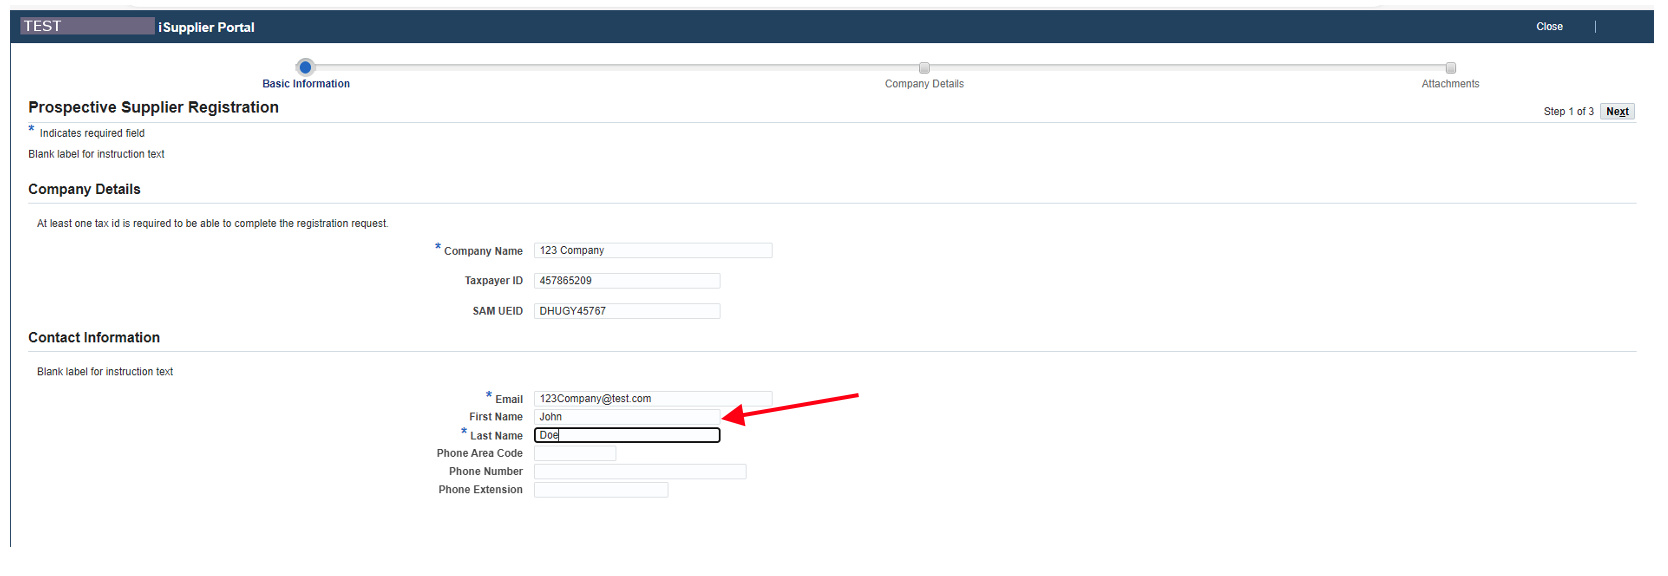
Step 5: Enter the primary contact’s first and last name.
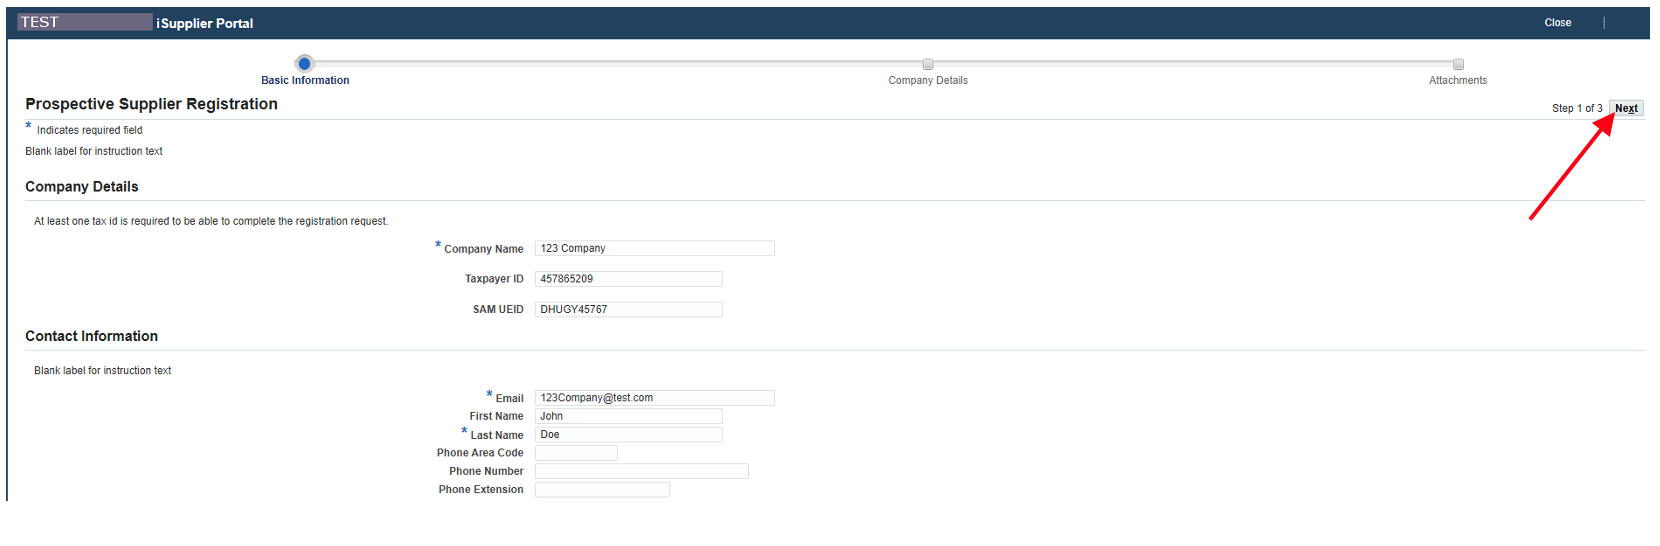
Step 6: Click ‘Next.’
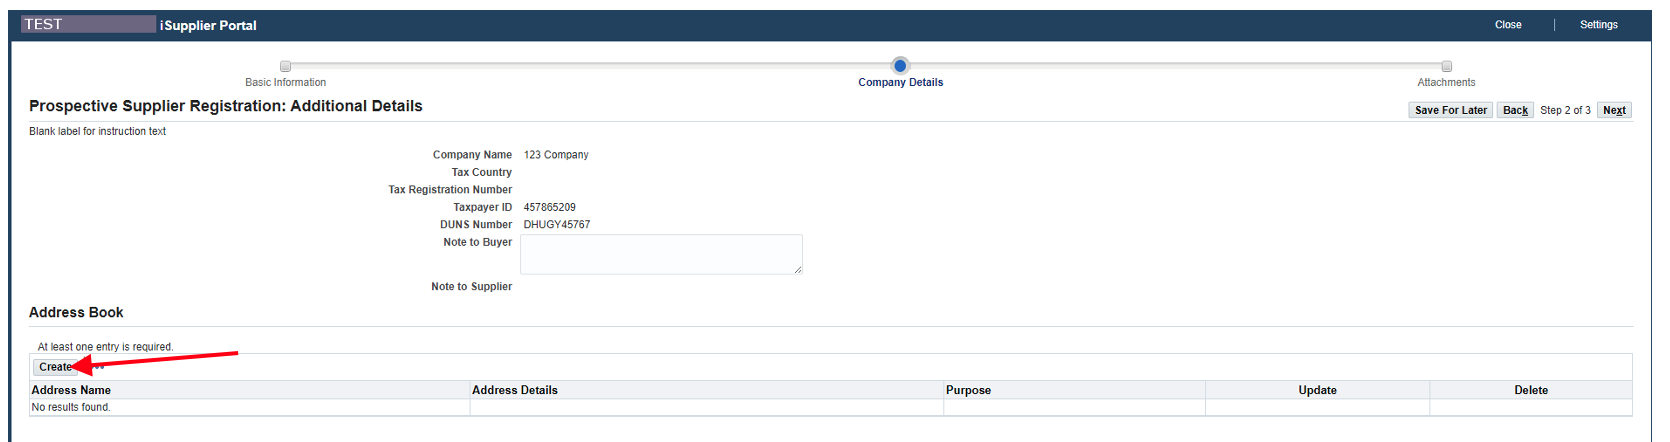
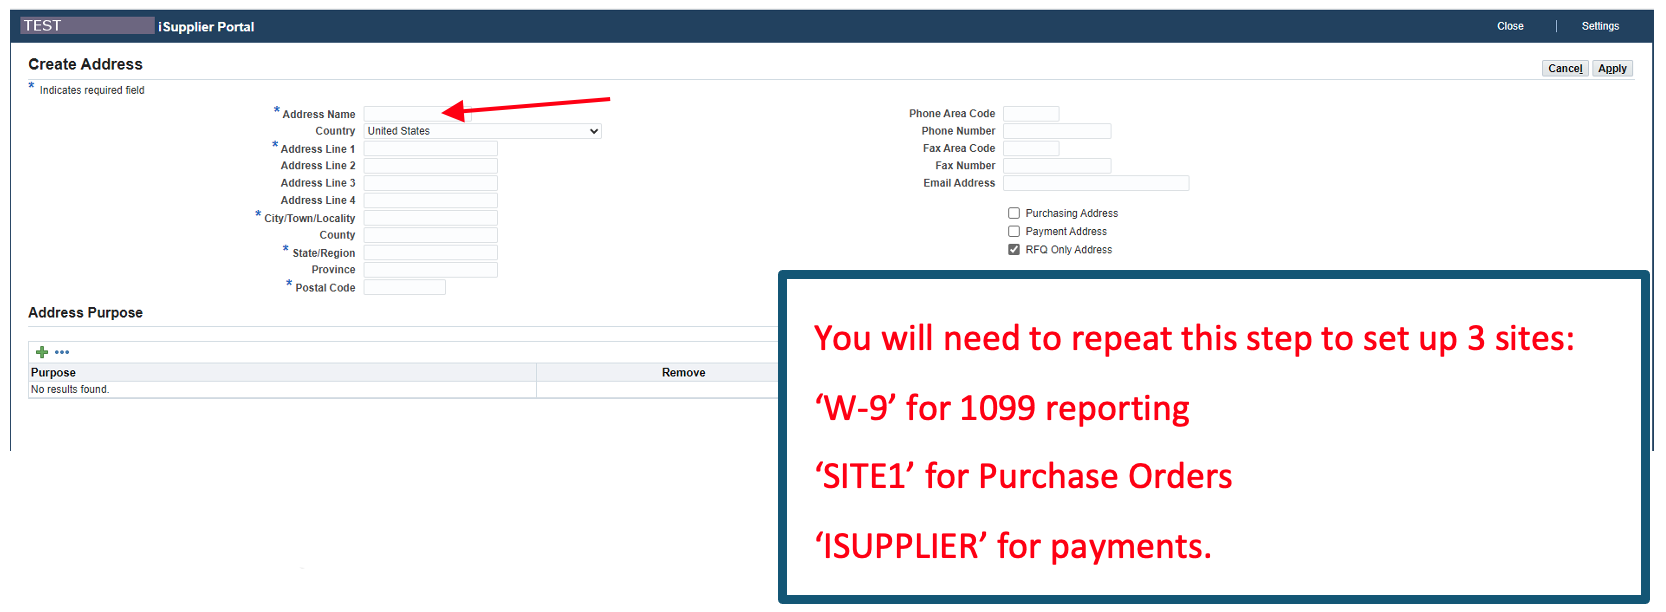
Step 7: Under the Address Book section, click ‘Create,’ which you’ll create three address sites:
- ‘W-9’ (address should be where you would prefer your 1099s mailed, if applicable)
- ‘SITE1’ (Main Business location)
- ‘ISUPPLIER’ (should be same as SITE1)
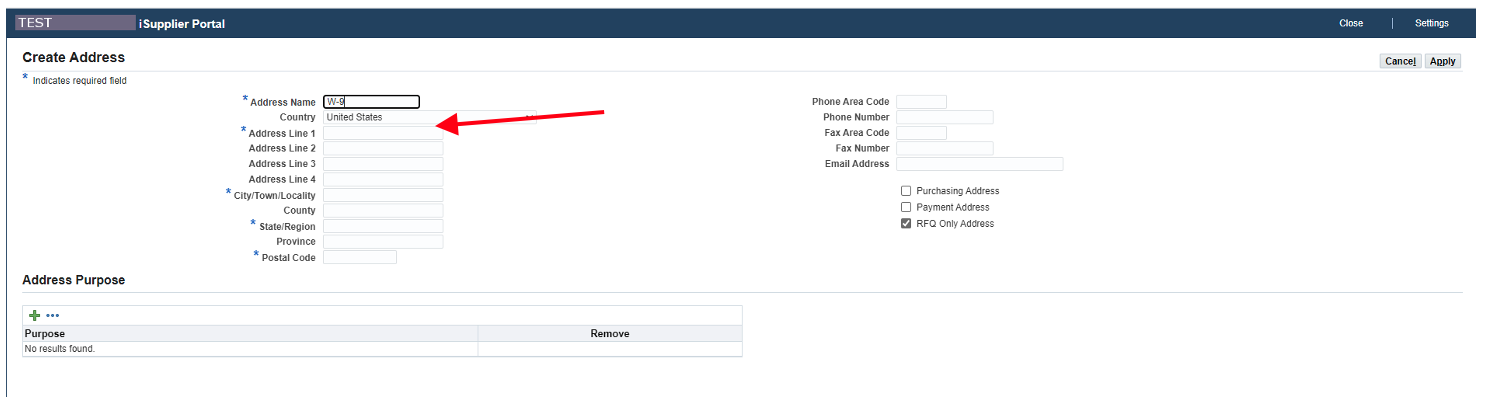
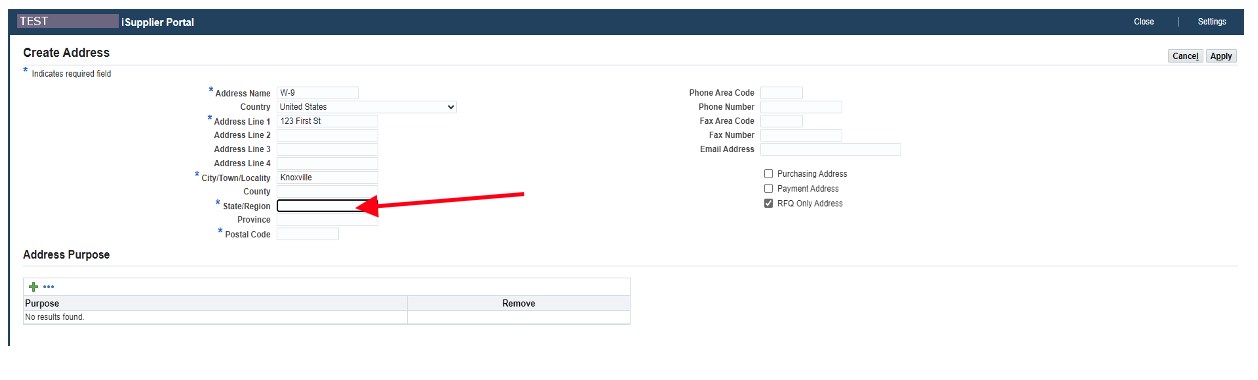
Step 8: Enter the address name (ex: W-9).
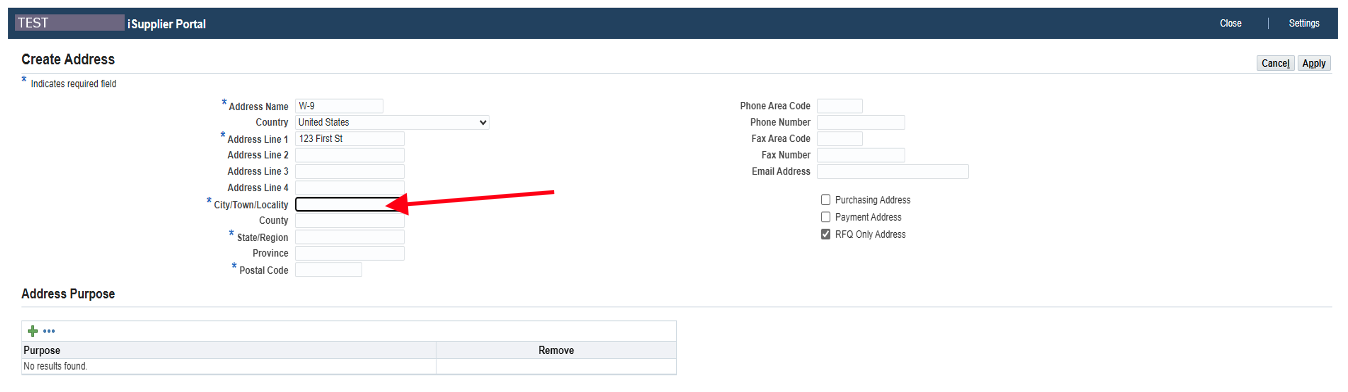
Step 9: Enter the street address.
Step 10: Enter the city.
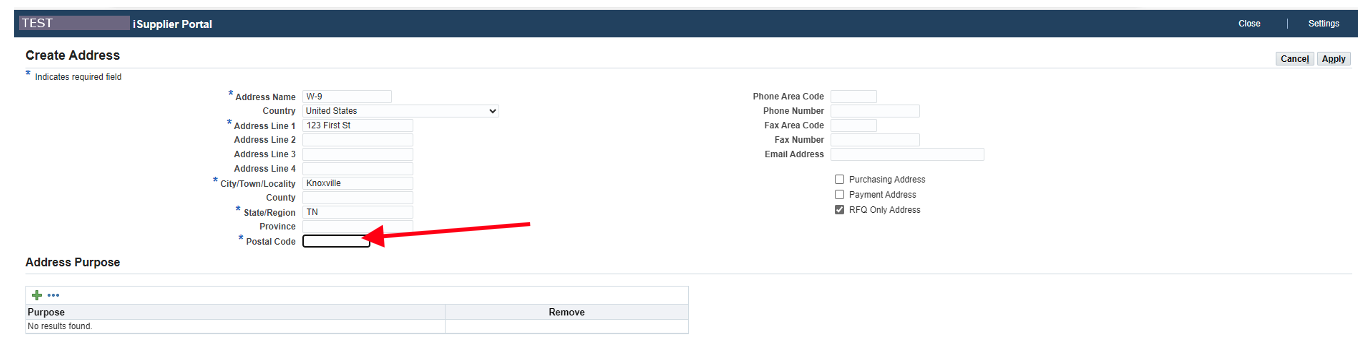
Step 11: Enter the state abbreviation.
Step 12: Enter the postal code.
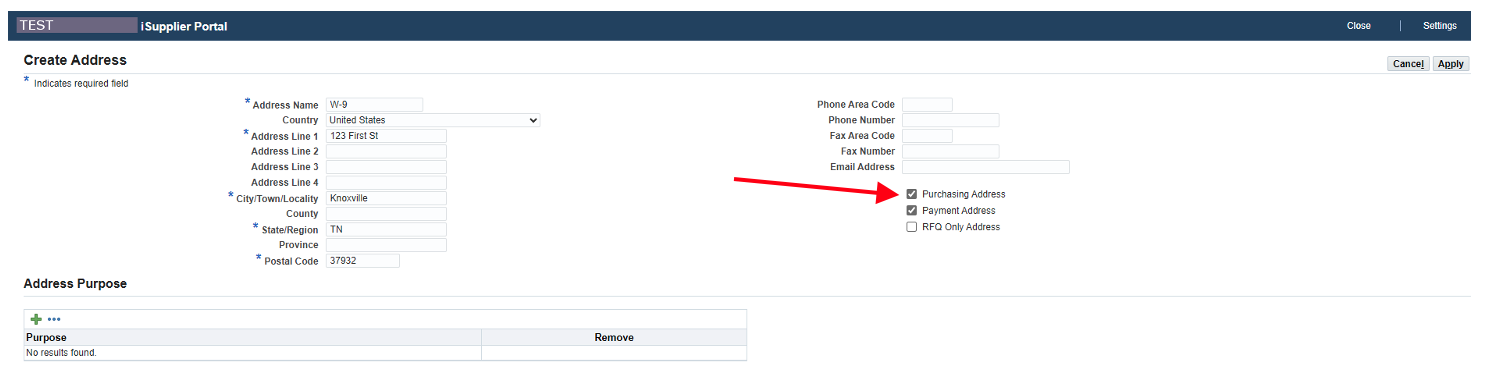
Step 13: Make the appropriate selections based on the entered address.
- ‘W-9’ (check only ‘Payment Address’)
- ‘SITE1’ (check ‘Purchasing and Payment Address’)
- ‘ISUPPLIER’ (check ‘Payment Address’)
** Always uncheck ‘RFQ Only Address’ on all created address sites.
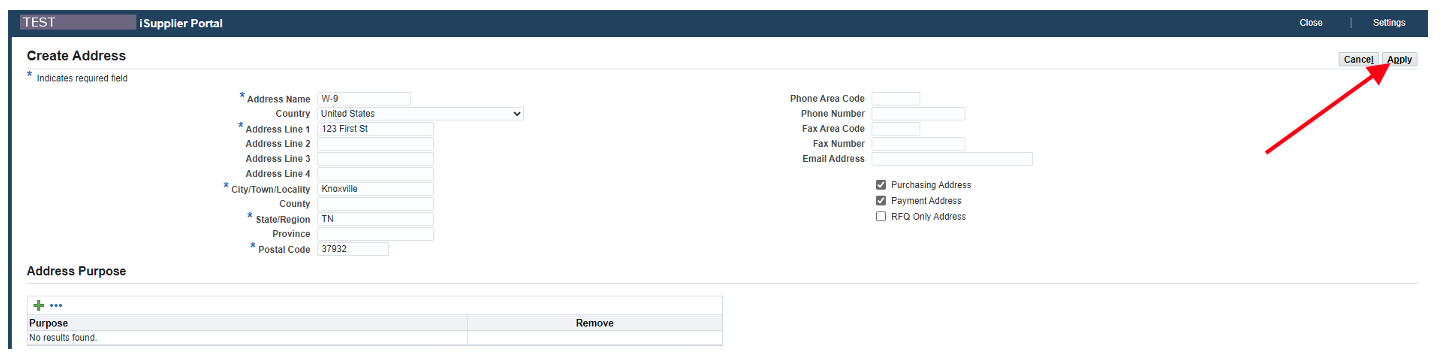
Step 14: Click ‘Apply.’
Step 15: Scroll to Address Book to confirm the newly created address.

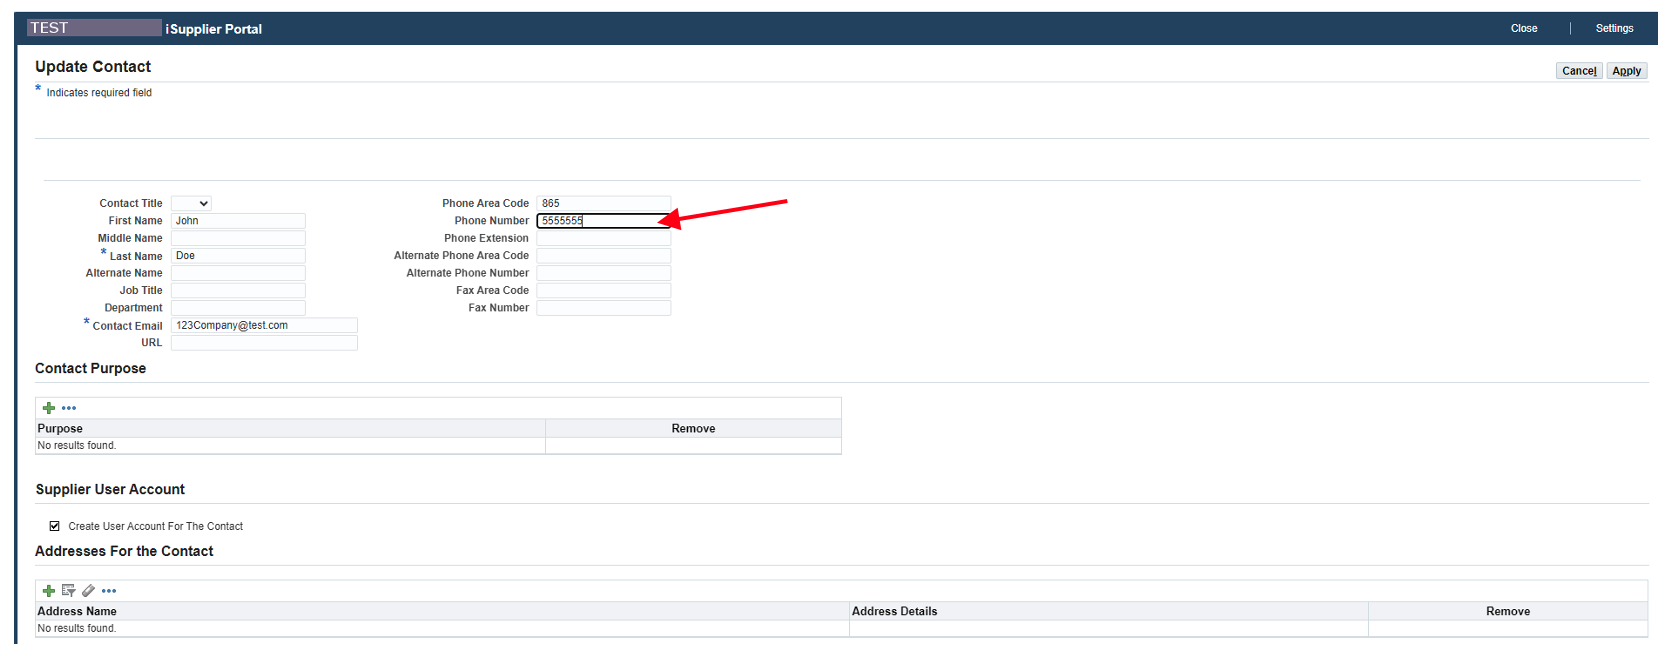
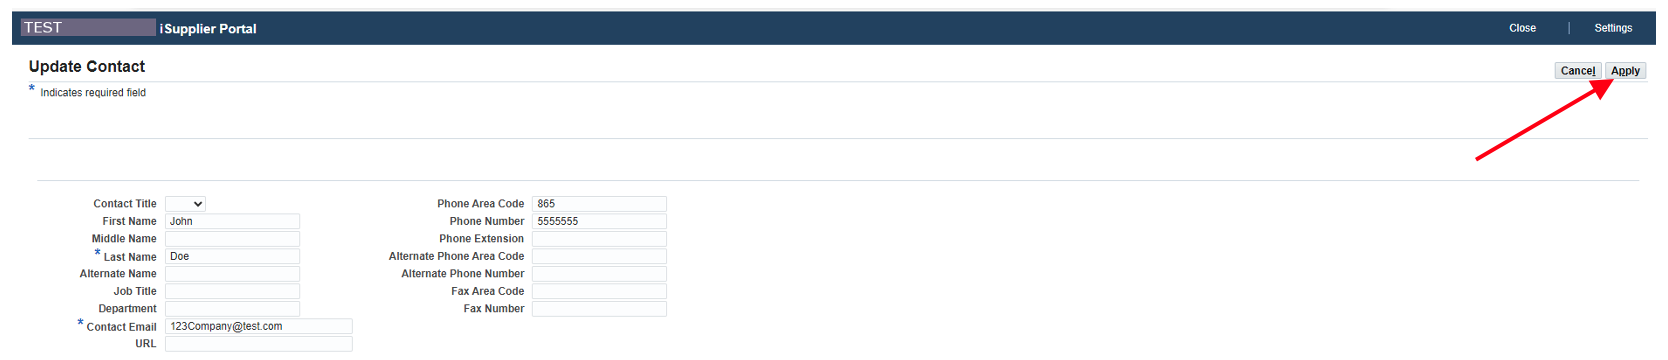
Step 16: On the contact you created, click the pencil icon to update.

Step 17: Enter a primary contact phone number.
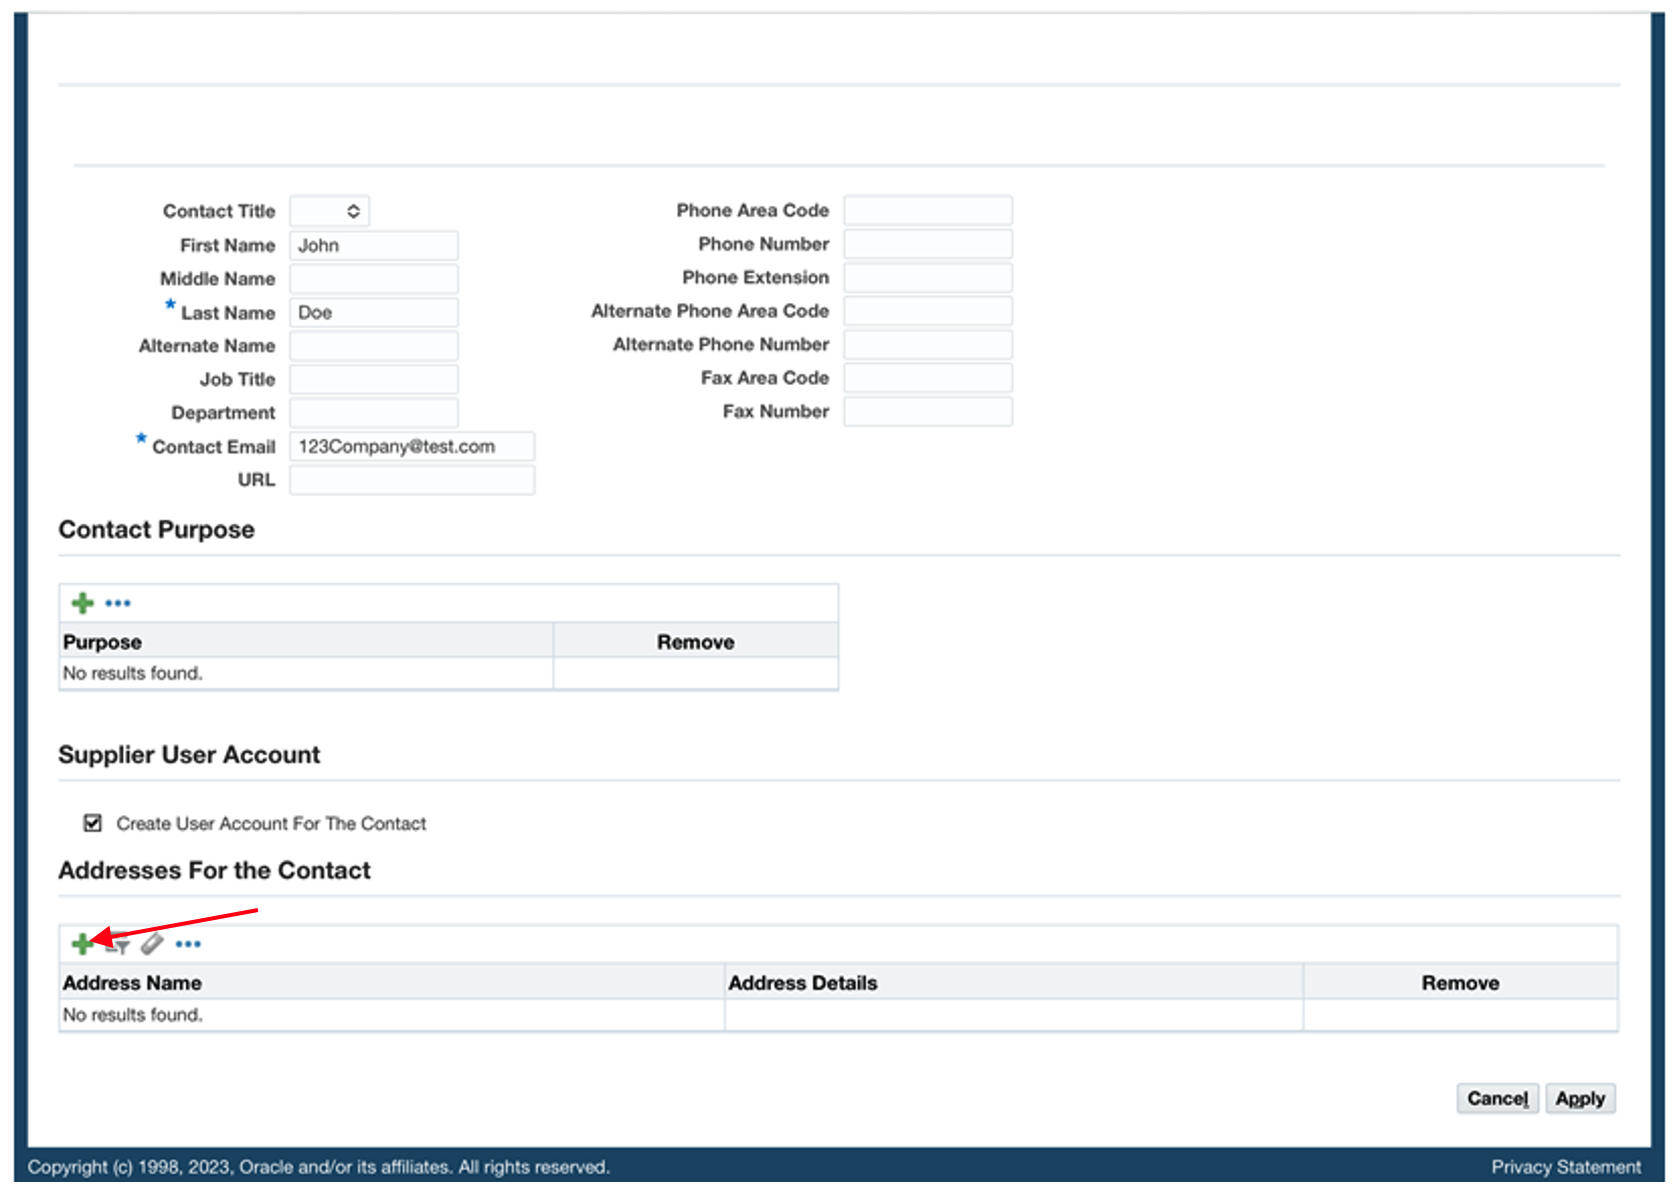
Step 18: Click on the ‘+’ under ‘Addresses For the Contact.’
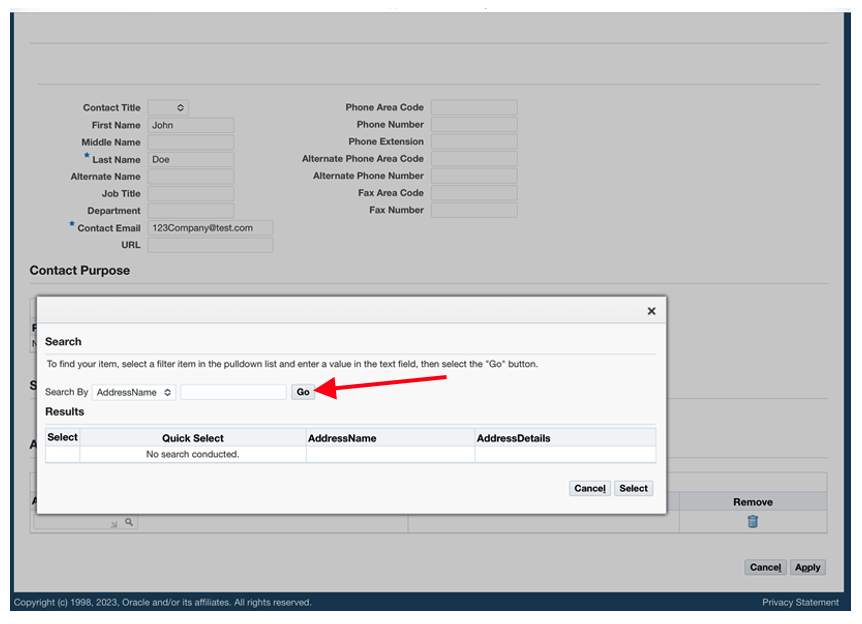
Step 19: Click the magnifying glass.

Step 20: A box will open and you’ll click ‘Go.’
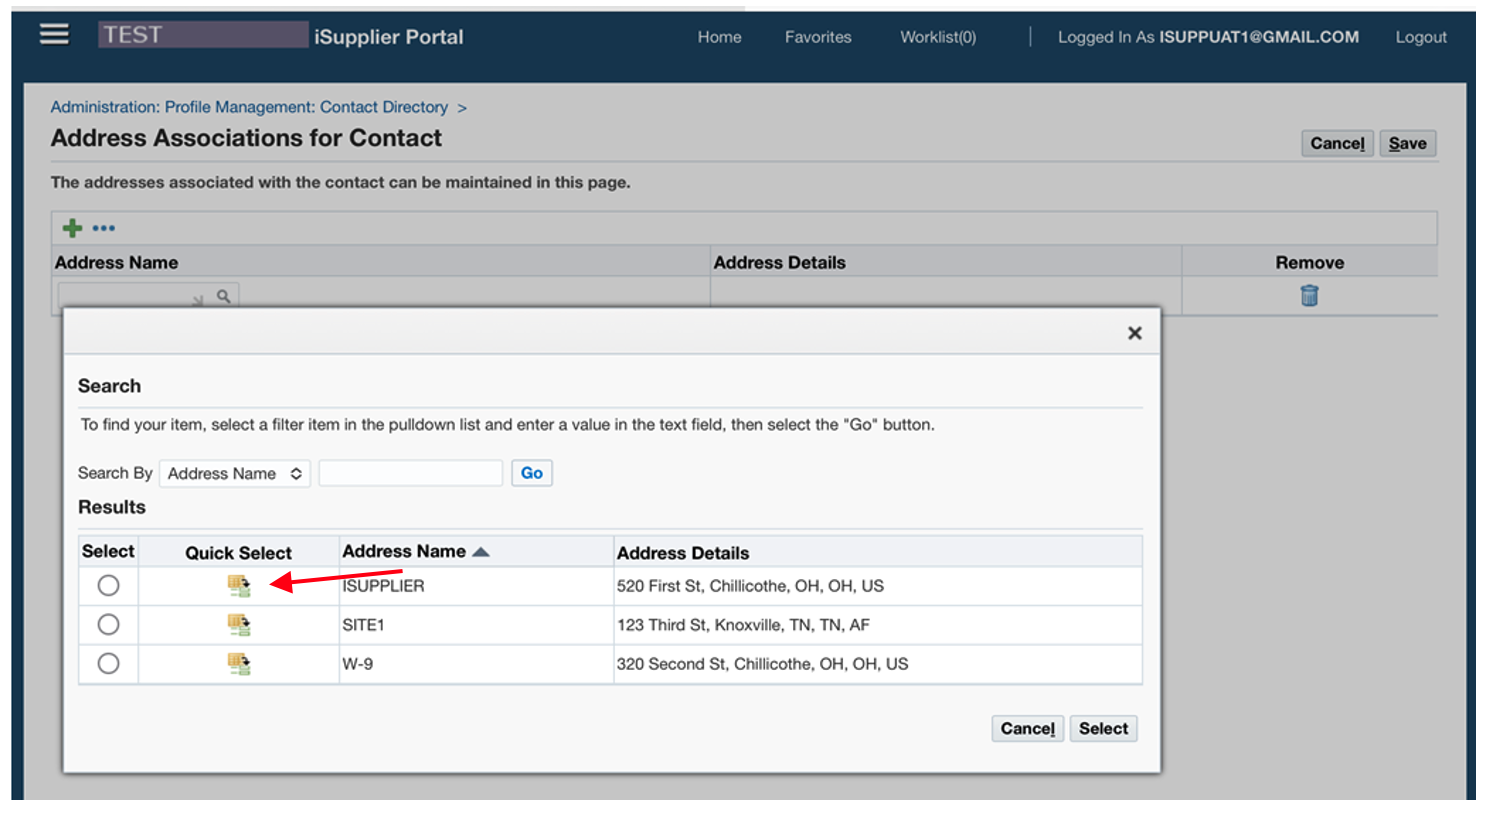
Step 21: Click the ‘Quick Select’ button to choose the ‘ISUPPLIER’ site then for ‘SITE1.’
Step 22: Click ‘Apply.’
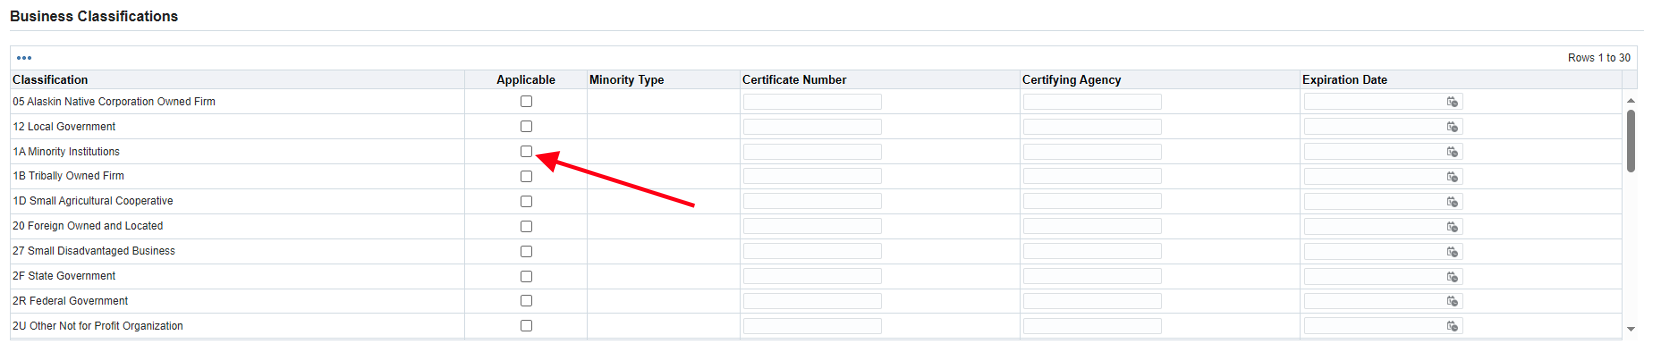
Step 23: Scroll down to Business Classifications and add any appropriate classifications by clicking the appropriate box under ‘Applicable.’
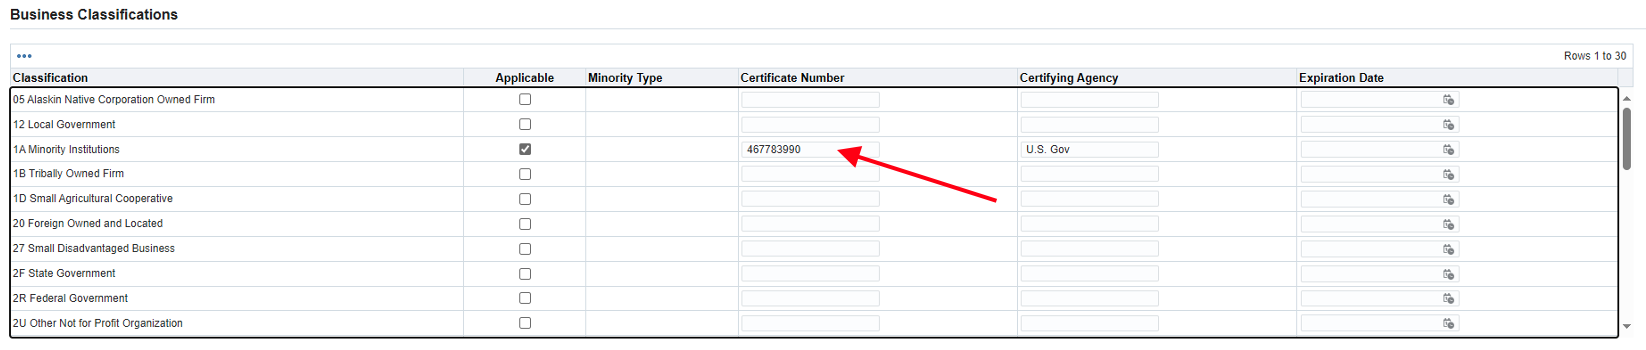
Step 24: Enter the relative information to the Business Classification.
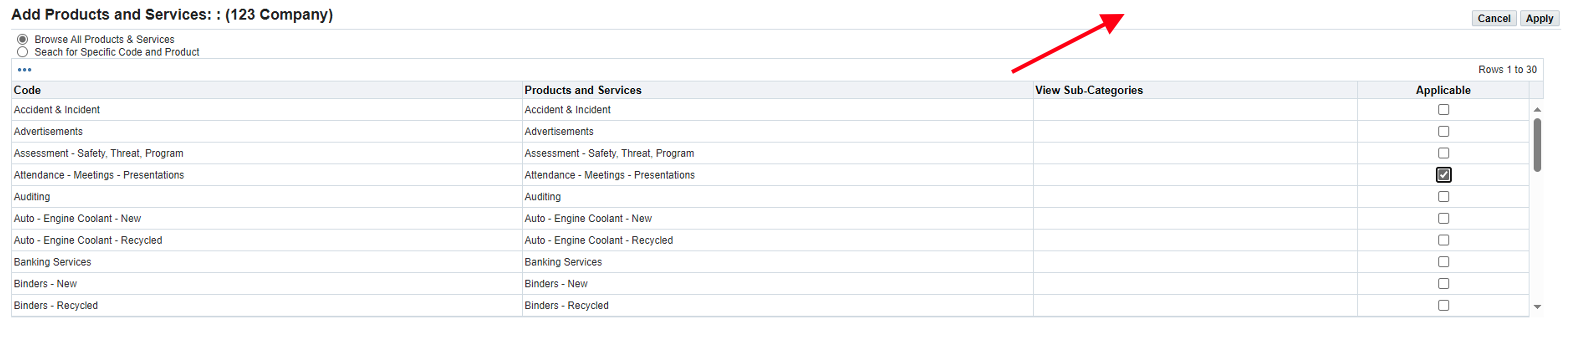
Step 25: Under the Products and Services section, click ‘Create.’

Step 26: Select the appropriate product or service from the list.
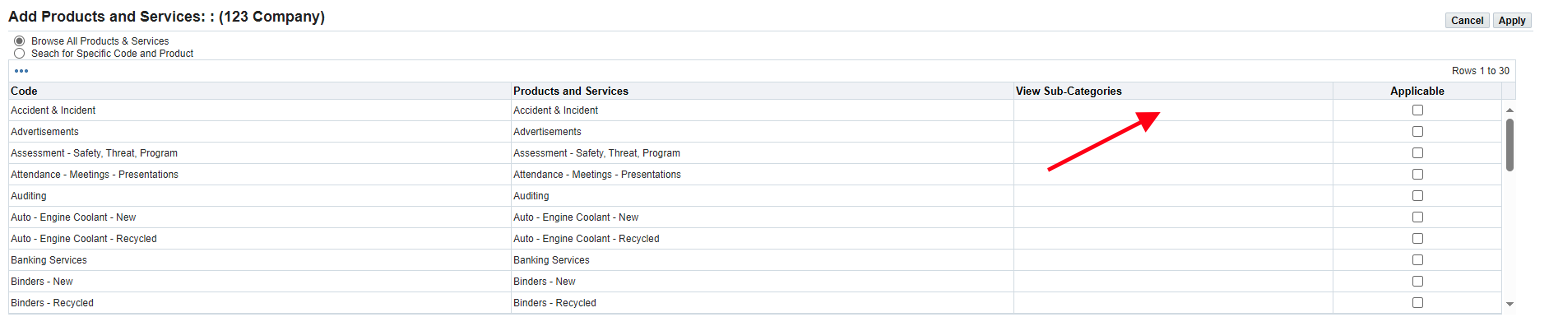
Step 27: Click ‘Apply.’
Step 28: Click ‘Next.’

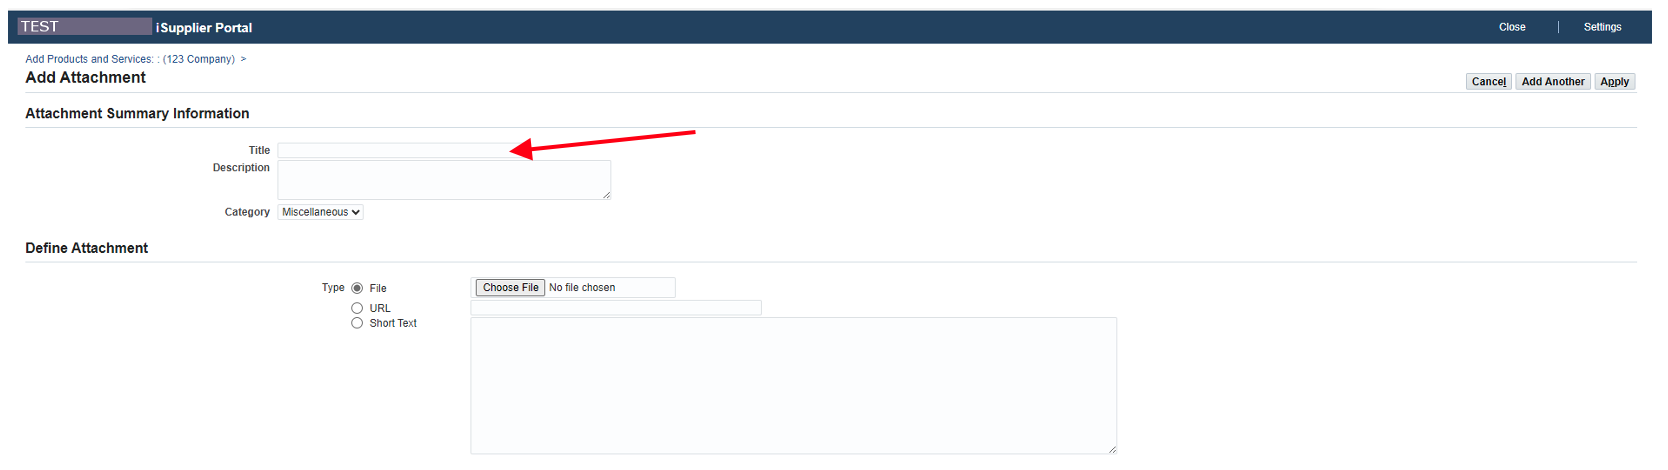
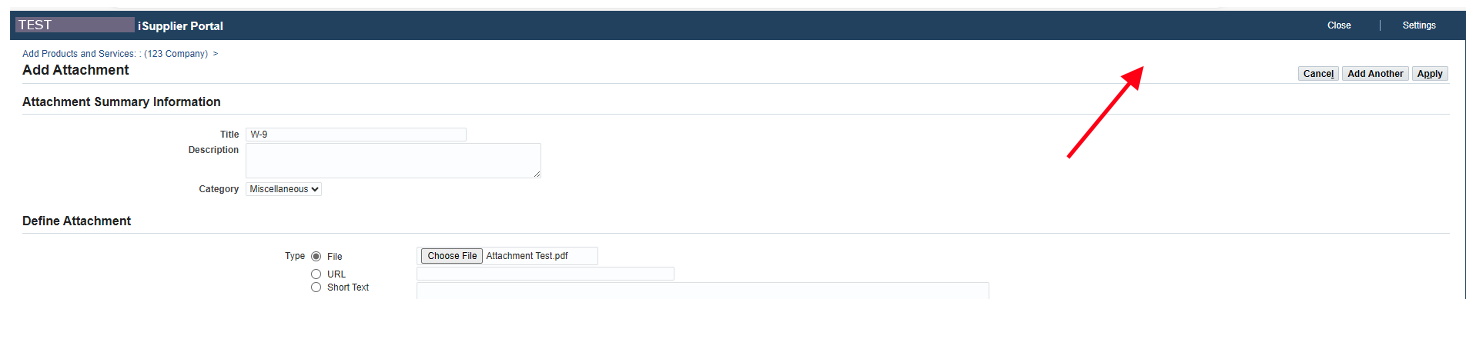
Step 29: Click the ‘Add Attachment’ button.

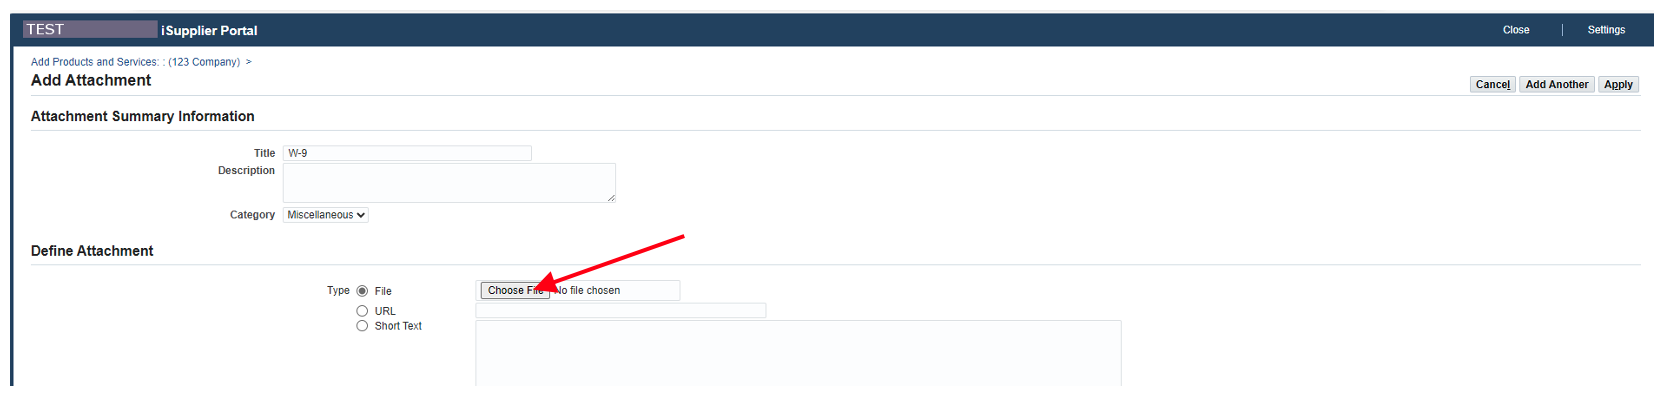
Step 30: Enter a title for the attachment (ex: W-9 form). *W-9 form is required to be uploaded to verify tax status.
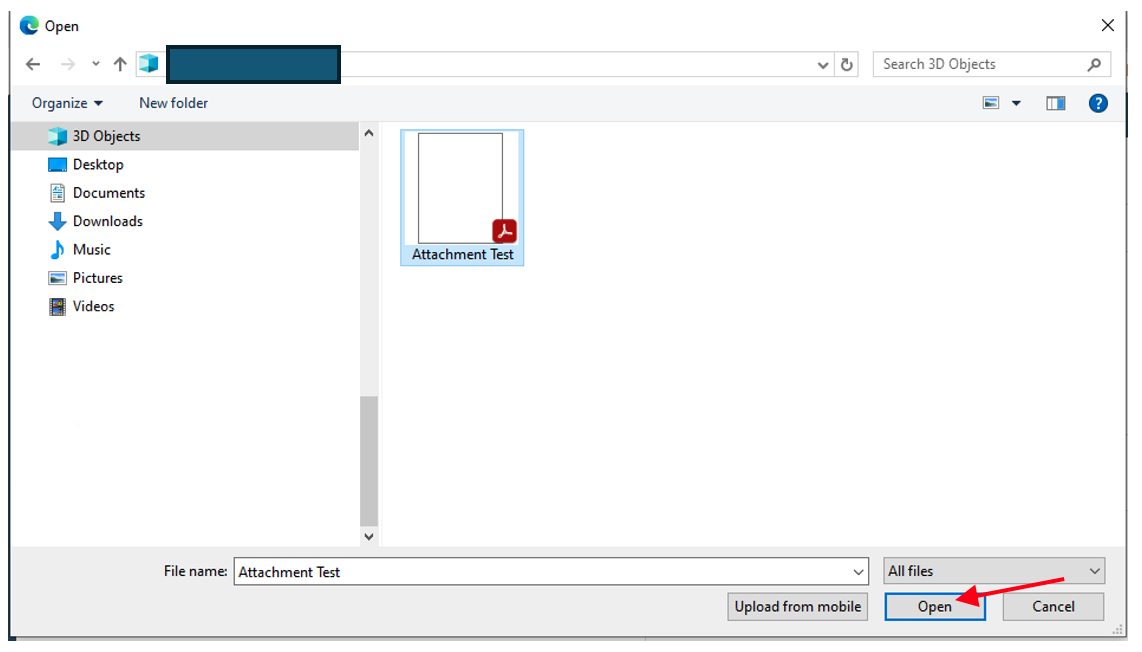
Step 31: Click ‘Choose File.’
Step 32: Select the attachment from your files.
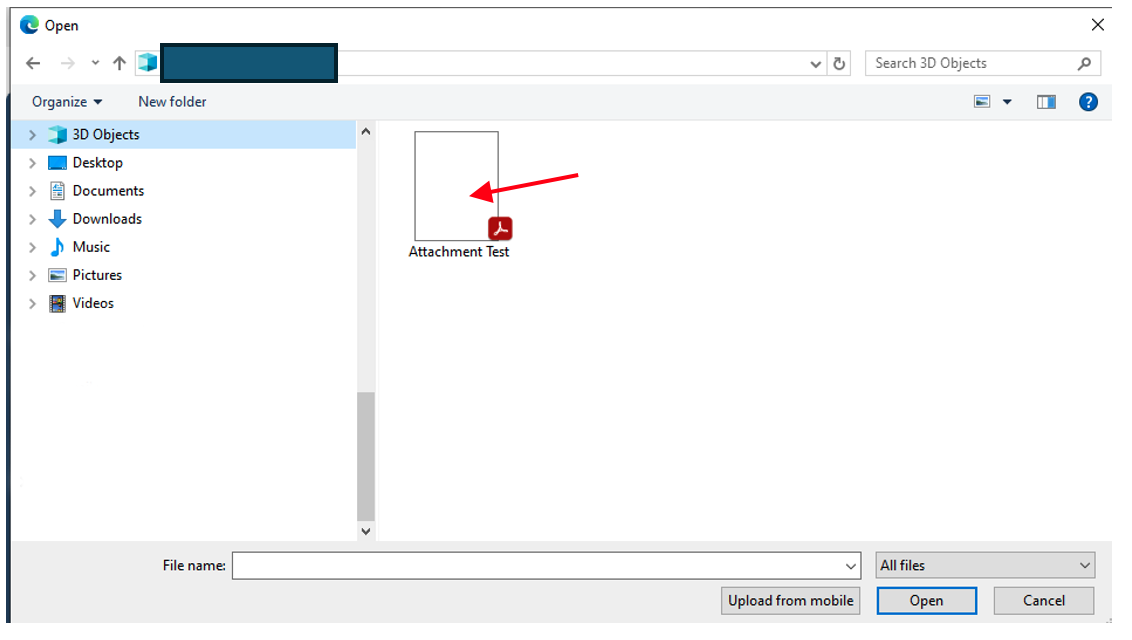
Step 33: Click the ‘Open’ button.
Step 34: Scroll down and click ‘Apply.’
Step 35: Click ‘Submit.’

Step 36: Supplier registration has been submitted.
